はじめに
今回の記事では .NET MAUI を使用したモバイルアプリ開発で AppShell を使用した画面遷移の方��法について見ていきます。
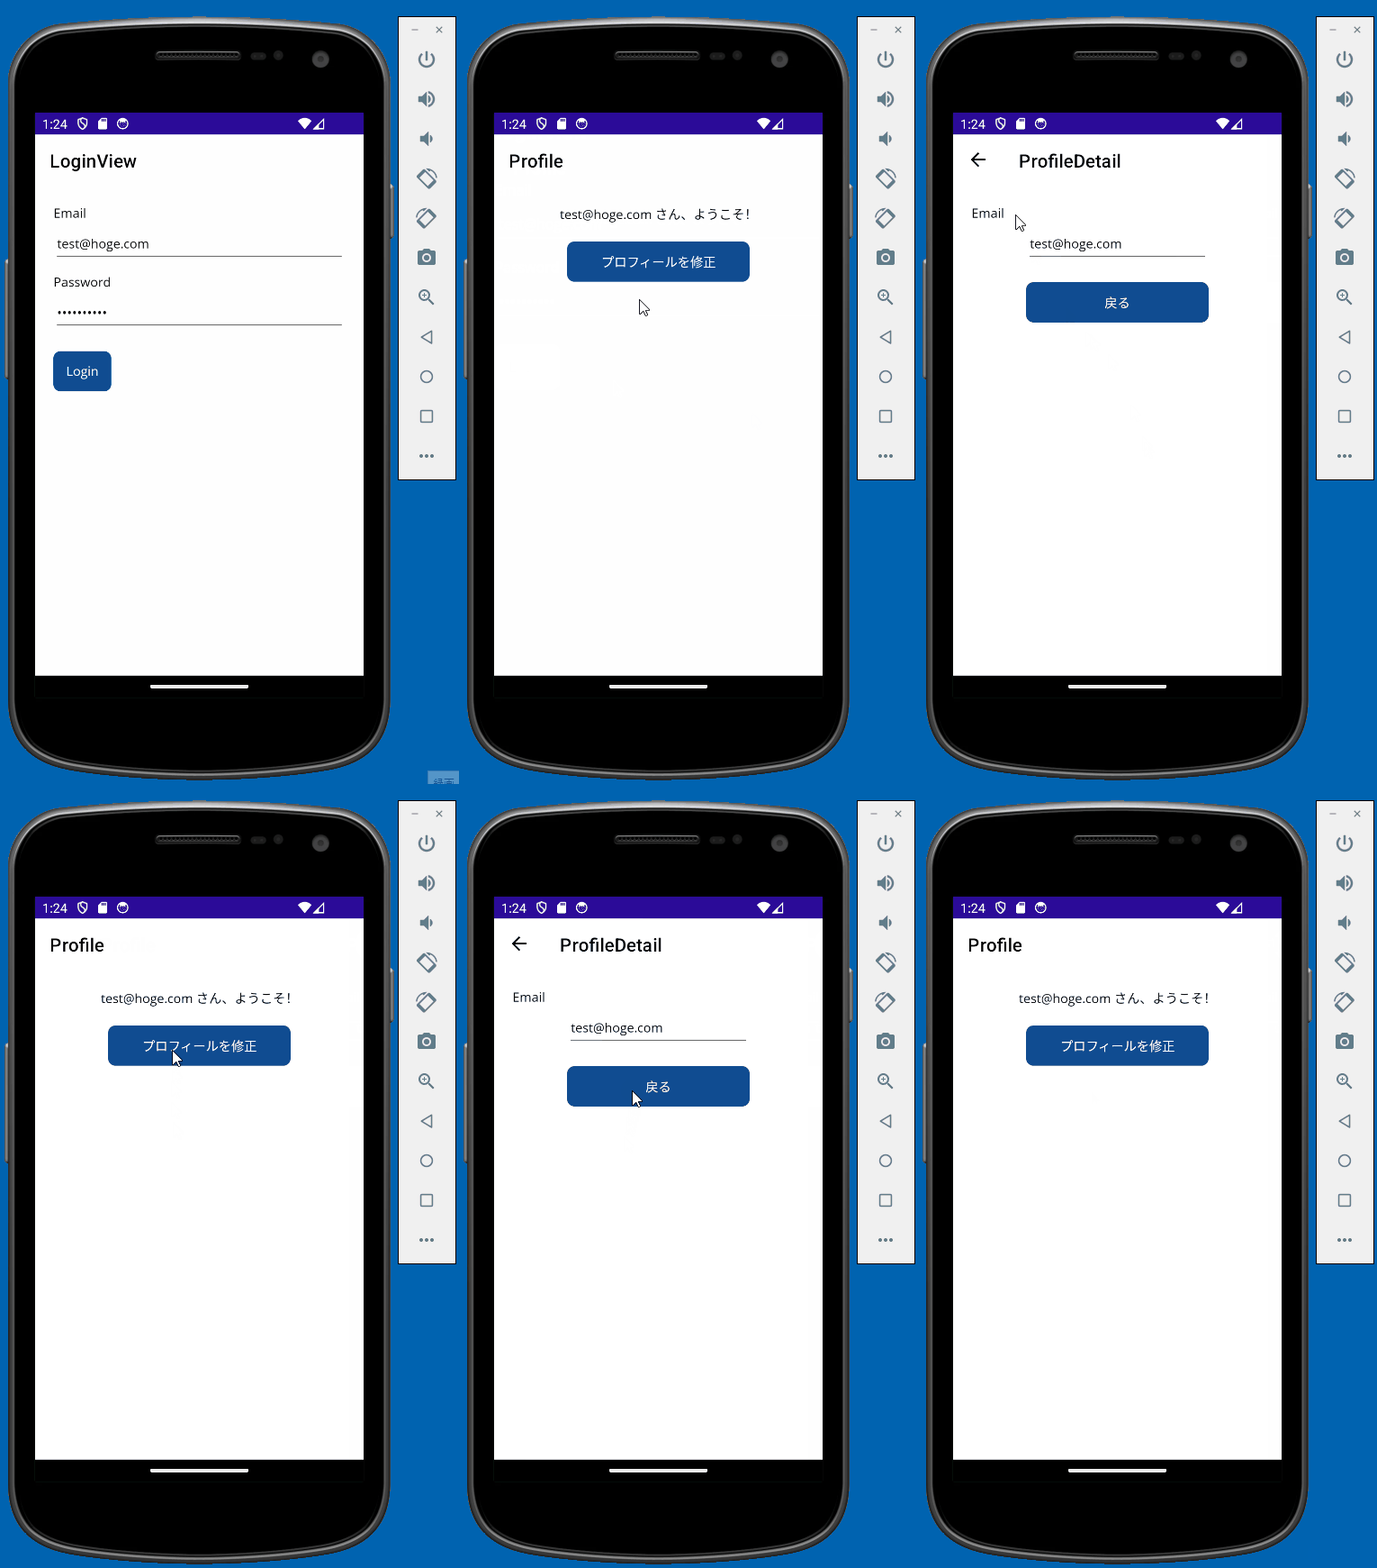
作成したサンプルアプリのイメージです。
開発環境
- Windows11
- .NET8
- Visual Studio 2022(Version 17.9.6)
画面の作成
まずは必要な画面を作成します。
プロジェクト内にViewsフォルダを作成し、LoginView.xamlというContentPageを作成します。
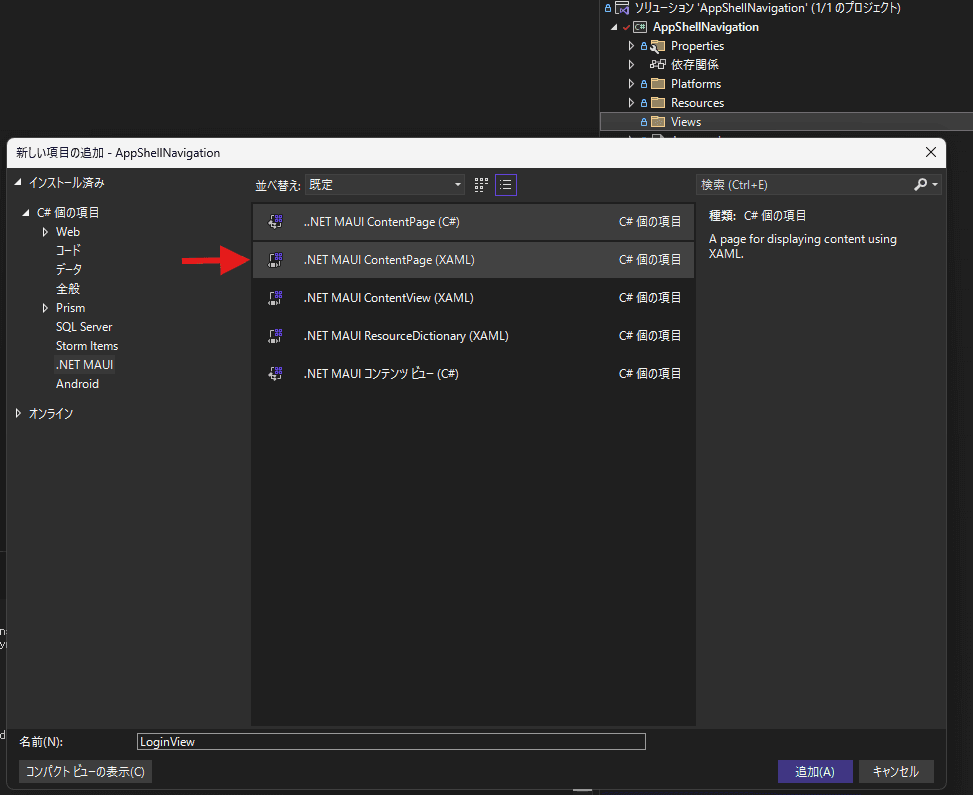
同様にProfile.xamlというProfileDetail.xamlというページを作成します。これらのページは現段階で手を加えず、AppShell.xamlに作成した画面を登録します。
<?xml version="1.0" encoding="UTF-8" ?>
<Shell x:Class="AppShellNavigation.AppShell"
       xmlns="http://schemas.microsoft.com/dotnet/2021/maui"
       xmlns:x="http://schemas.microsoft.com/winfx/2009/xaml"
-      xmlns:local="clr-namespace:AppShellNavigation"
+      xmlns:local="clr-namespace:AppShellNavigation.Views"
       Title="AppShellNavigation"
       Shell.FlyoutBehavior="Disabled">

-   <ShellContent Title="Home"
-                 ContentTemplate="{DataTemplate local:MainPage}"
-                 Route="MainPage" />

    <!--  一番上に記述したものが起動時のトップページとして表示される  -->
+   <ShellContent Title="LoginView"
+                 ContentTemplate="{DataTemplate local:LoginView}"
+                 Route="loginView" />

+   <ShellContent Title="Profile"
+                 ContentTemplate="{DataTemplate local:Profile}"
+                 Route="profile" />

+   <ShellContent Title="ProfileDetail"
+                 ContentTemplate="{DataTemplate local:ProfileDetail}"
+                 Route="profiledetail" />

</Shell>コメントに書いてある通り、複数のページを登録した場合は一番上に記述されたShellContentが起動後のトップページとして表示されます。
そしてRoute属性で指定した URI が画面遷移する際の情報になります。
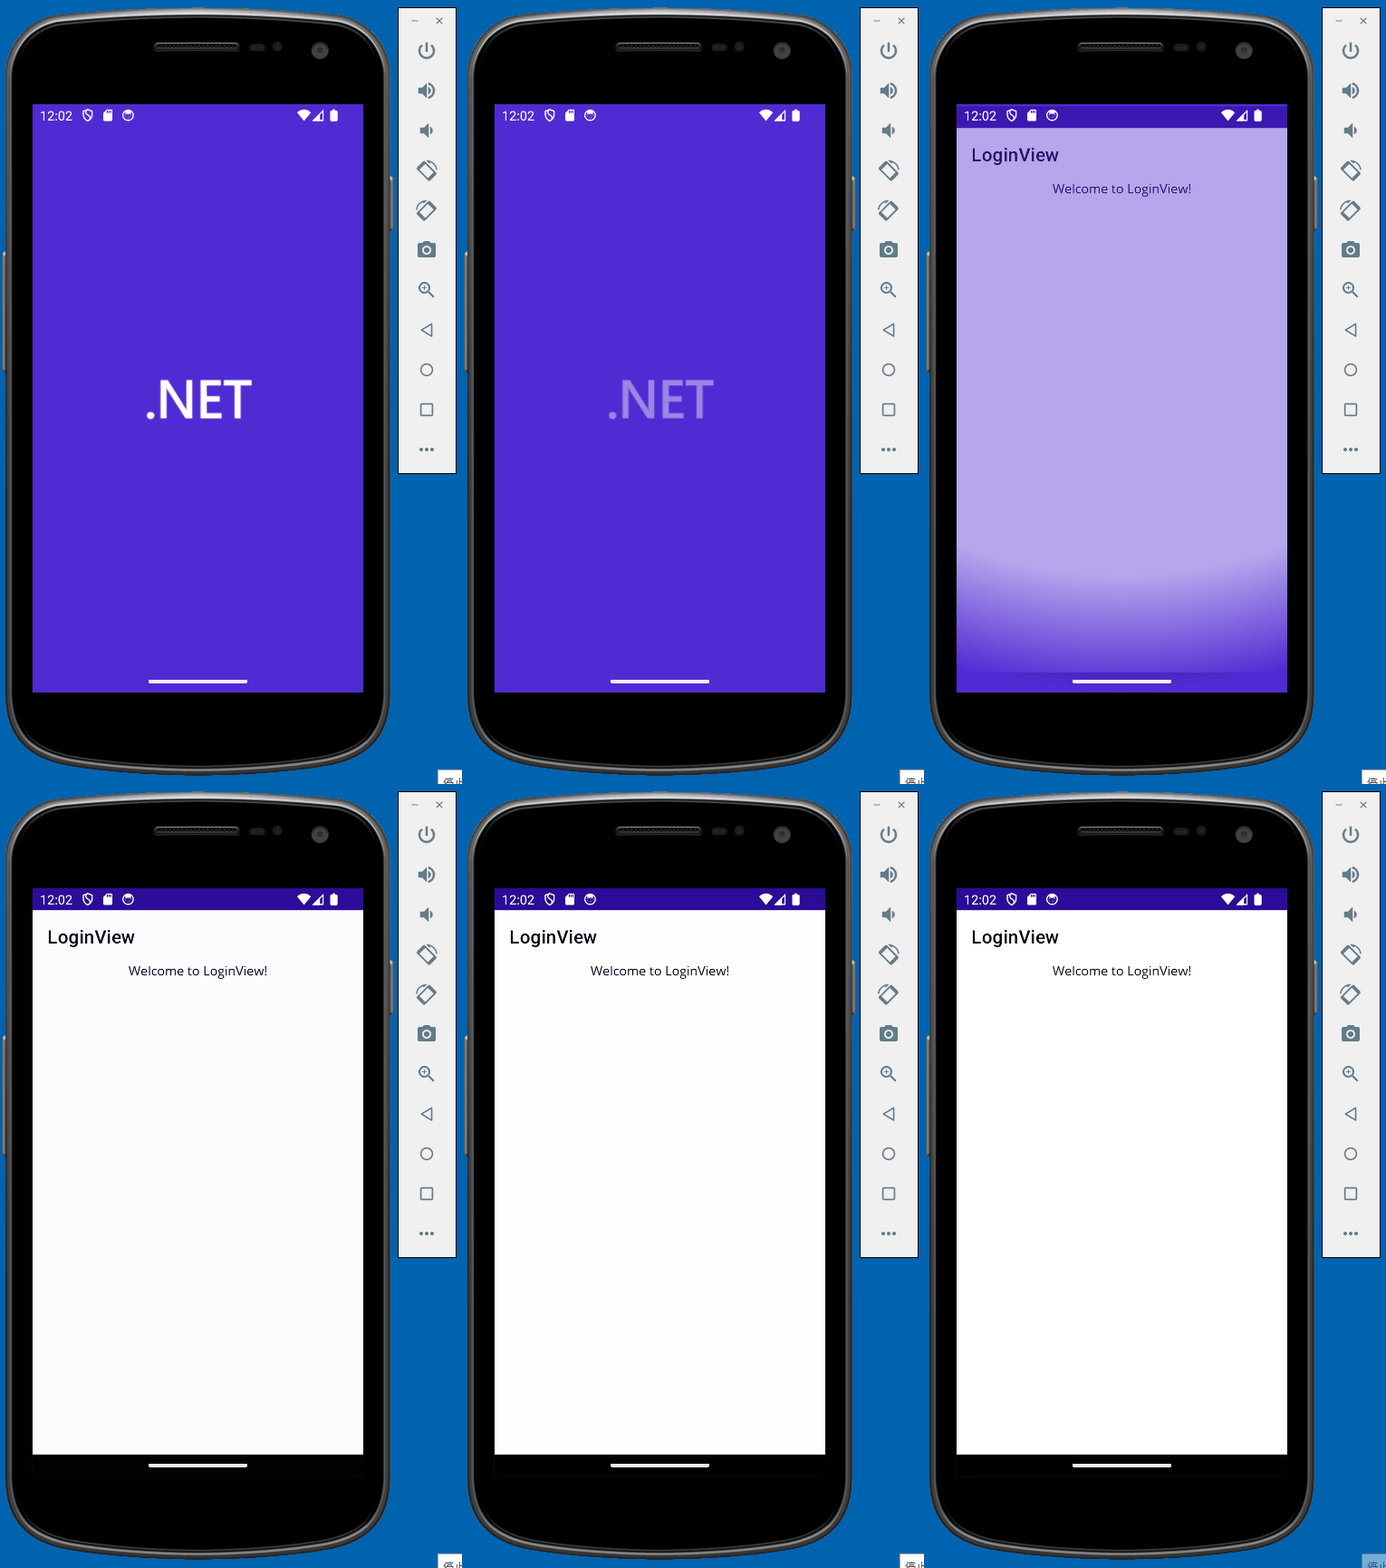
現段階でアプリを起動するとログインページが表示されていることが分かります。
次にLoginView.xamlを以下のように修正します。
<?xml version="1.0" encoding="utf-8" ?>
<ContentPage x:Class="AppShellNavigation.Views.LoginView"
xmlns="http://schemas.microsoft.com/dotnet/2021/maui"
xmlns:x="http://schemas.microsoft.com/winfx/2009/xaml"
xmlns:viewModels="clr-namespace:AppShellNavigation.ViewModels"
Title="LoginView"
x:DataType="viewModels:LoginViewModel">
<!-- ↑ xmlns:viewModels でViewModelの名前空間を指定 -->
<!-- ↑ x:DataType コ��ンパイル時にバインディングが検証されるようにする -->
<VerticalStackLayout Padding="20" MaximumWidthRequest="600">
<VerticalStackLayout>
<Label Text="Email" />
<Entry Margin="0,2,0,0"
Text="{Binding Email}"
VerticalOptions="Center" />
</VerticalStackLayout>
<VerticalStackLayout Margin="0,10,0,0">
<Label Text="Password" />
<Entry Margin="0,2,0,0"
IsPassword="True"
Text="{Binding Password}"
VerticalOptions="Center" />
</VerticalStackLayout>
<Button Margin="0,20,0,0"
Command="{Binding SubmitCommand}"
HorizontalOptions="Start"
Text="Login" />
</VerticalStackLayout>
</ContentPage>ViewModelsフォルダを作成しLoginViewModel.csを作成して画面のプロパティとデータバインディングされるように実装します。
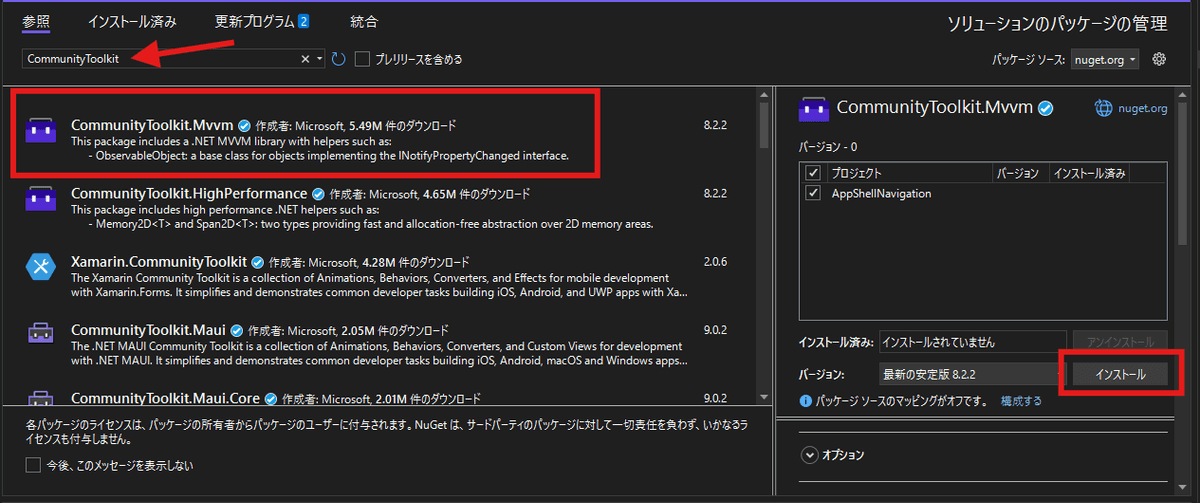
その際にプロパティ変更通知やコマンドの実装など簡単にできるライブラリとしてCommunityToolkit.Mvvmをインストールしておきます。
x:DataTypeではコンパイル済みのバインディングという機能を使用しており、実行時ではなくコンパイル時にバインディングを検証することで無効なバインディングのエラーを検出しやすくなります。
この機能は.NET MAUI では規定で有効になっているのでx:DataTypeを指定していないと、以下のような警告が表示されます。
重大度レベル コード 説明 プロジェクト ファイル 行 抑制状態 警告 Binding could be compiled if x:DataType is specified. AppShellNavigation C:\Users\[user]\source\repos\CsharpSample\SampleMaui\AppShellNavigation\AppShellNavigation\Views\LoginView.xaml 10
XAML のコンパイルを無効にする方法は「XAML コンパイルを無効にする」に記述されています。
また、xmlns:viewModelsの箇所で ViewModel の名前空間を指定します。
LoginViewModel.csはCommunityToolkit.Mvvmを使用して実装します。
using CommunityToolkit.Mvvm.ComponentModel;
using CommunityToolkit.Mvvm.Input;

namespace AppShellNavigation.ViewModels
{
    // partial を指定する
    // ※簡略したコードをライブラリ側で自動生成するため
    // 参考: https://github.com/CommunityToolkit/dotnet/issues/117
    public partial class LoginViewModel : ObservableObject
    {
        [ObservableProperty]
        private string _email = "test@hoge.com"; // 便宜上初期値を入れておく

        [ObservableProperty]
        private string _password = "1234567890";

        [RelayCommand]
        private async Task Submit() // XAML側では Command を加えて SubmitCommand と指定する
        {
            // プロフィールページに遷移する
            await Shell.Current.GoToAsync("//profile");
        }
    }
}
作成した ViewModel をBindingContextに代入します。
using AppShellNavigation.ViewModels;

namespace AppShellNavigation.Views;

public partial class LoginView : ContentPage
{
	public LoginView()
	{
		InitializeComponent();

+	    BindingContext = new LoginViewModel();
	}
}またProfile.xamlも以下のように修正します。
<?xml version="1.0" encoding="utf-8" ?>
<ContentPage x:Class="AppShellNavigation.Views.Profile"
             xmlns="http://schemas.microsoft.com/dotnet/2021/maui"
             xmlns:x="http://schemas.microsoft.com/winfx/2009/xaml"
             Title="Profile">
    <VerticalStackLayout Padding="20" MaximumWidthRequest="600">
        <Label HorizontalOptions="Center"
               Text="◯◯さん ようこそ!"
               VerticalOptions="Center" />
    </VerticalStackLayout>
</ContentPage>
画面遷移の動作も含めて一度動作確認してみます。
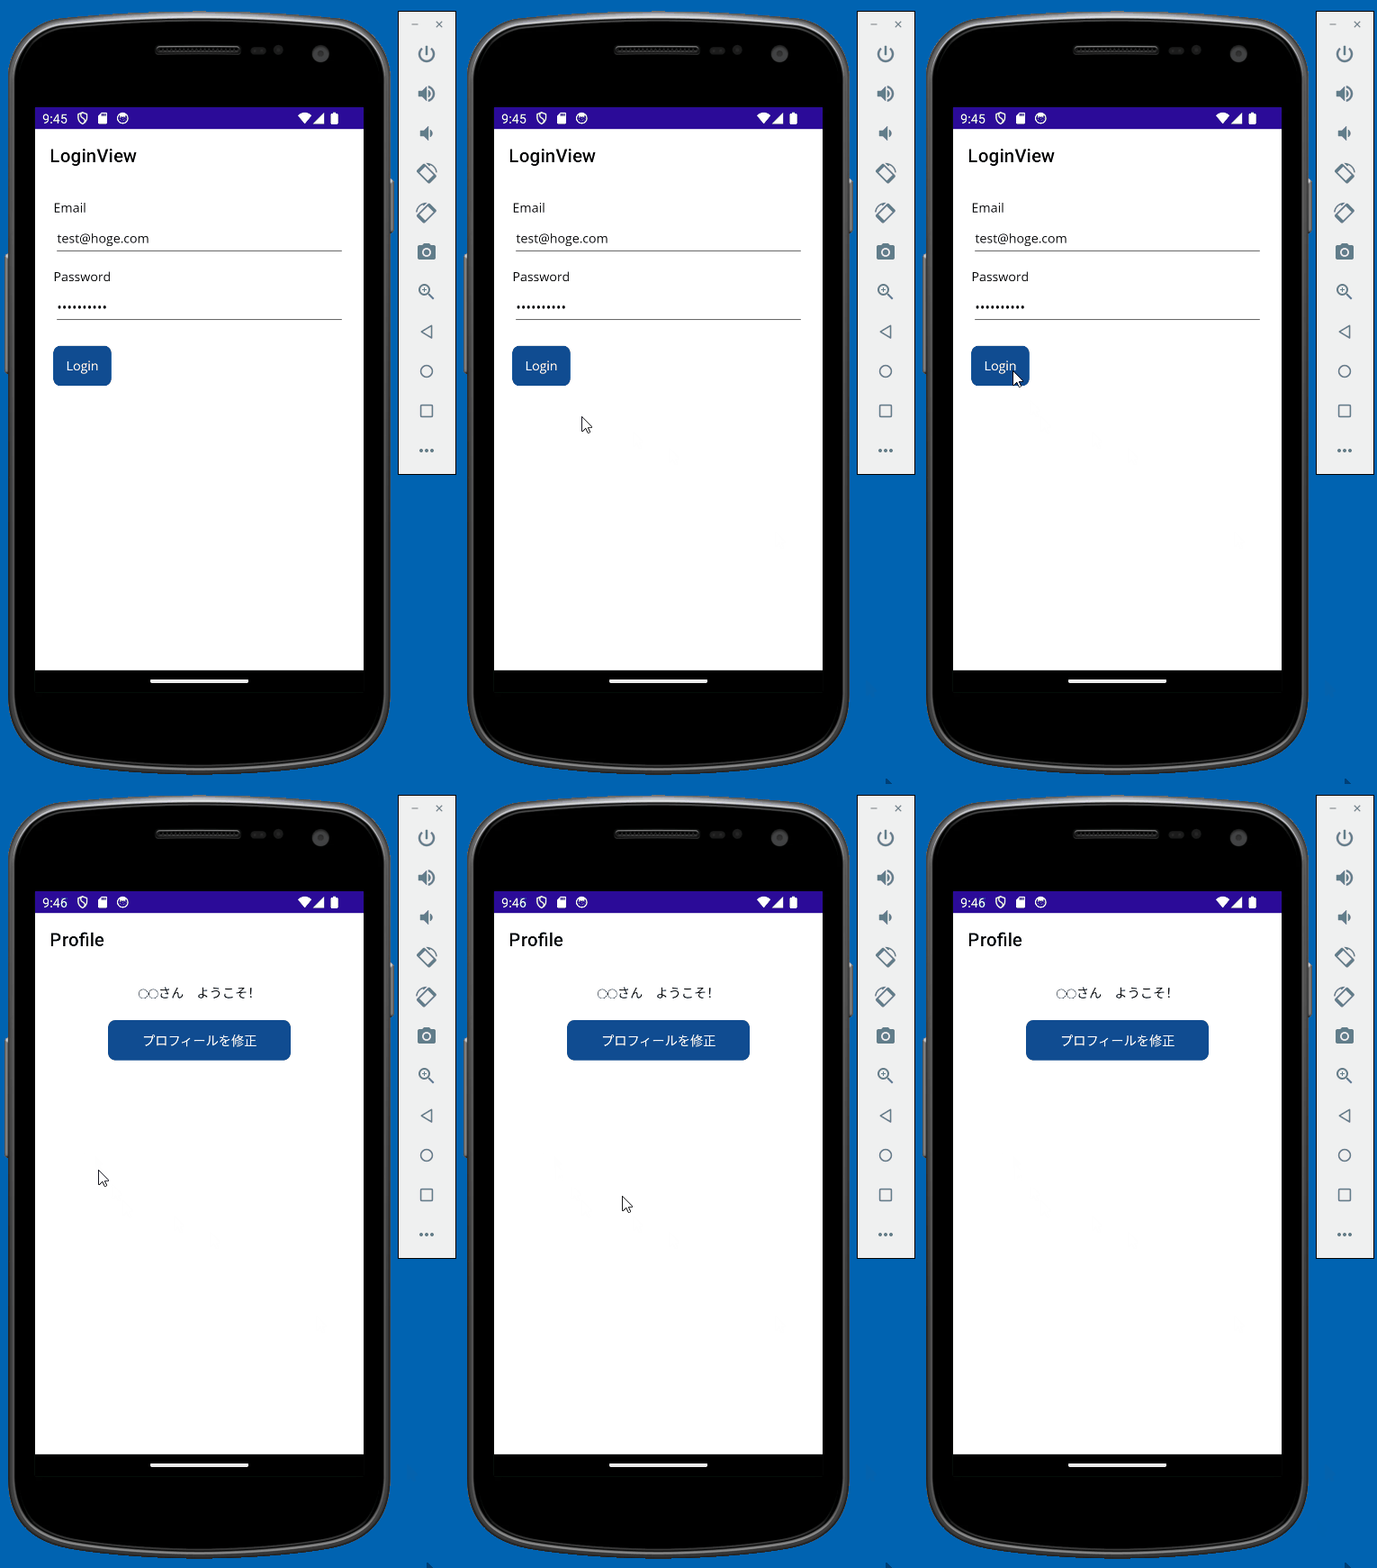
画面が切り替わっていることが確認できました。
パラメ��ーターを受け取る
LoginView.xamlからProfile.xamlに遷移した際にパラメータを受け取るように修正します。
Shell.Current.GoToAsyncの第に引数にDictionaryを渡して、受け取り側の ViewModel で[QueryProperty]属性を指定します。
// 省略

    [RelayCommand]
    private async Task Submit()
    {
        // パラメーターとして渡す値の型は key = string, value = object と指定する
        var parameters = new Dictionary<string, object>
        {
            { "email", Email }
        };

        // プロフィールページに遷移する
        await Shell.Current.GoToAsync("//profile", parameters);
}ProfileViewModel.csとProfile.xamlを修正します。
using CommunityToolkit.Mvvm.ComponentModel;
using CommunityToolkit.Mvvm.Input;

namespace AppShellNavigation.ViewModels
{
    // (ProfileViewModel側のプロパティ, Dictionaryで指定した key 名)
    [QueryProperty(nameof(Email), "email")]
    public partial class ProfileViewModel : ObservableObject
    {
        [ObservableProperty]
        private string _email;

        [ObservableProperty]
        private string _modifiedEmail;

        // プロパティに変更があった際に差し込みたい処理
        partial void OnEmailChanged(string value)
        {
            ModifiedEmail = $"{value} さん、ようこそ!";
        }

        [RelayCommand]
        private async Task ProfileDetgail()
        {
            await Application.Current.MainPage.DisplayAlert("Alert", "クリック!", "OK");
        }
    }
}OnEmailChangedメソッドはCommunityToolkit.Mvvmの機能で、プロパティ変更時に差し込みたい処理を実装しています。
ここでは_email変更時に email の文字列にさん、ようこそ!という文字列を加えてModifiedEmailプロパティに代入する処理を加えています。
メソッドには命名規則があり、On[プロパティ名]Changedとし、メソッドにpartialにすることでライブラリ側で変換してくれます。
<?xml version="1.0" encoding="utf-8" ?>
<ContentPage x:Class="AppShellNavigation.Views.Profile"
             xmlns="http://schemas.microsoft.com/dotnet/2021/maui"
             xmlns:x="http://schemas.microsoft.com/winfx/2009/xaml"
             xmlns:viewModel="clr-namespace:AppShellNavigation.ViewModels"
             Title="Profile"
             x:DataType="viewModel:ProfileViewModel">
    <VerticalStackLayout Padding="20" MaximumWidthRequest="600">
        <Label HorizontalOptions="Center"
               Text="{Binding ModifiedEmail}"
               VerticalOptions="Center" />

        <Button Margin="0,20,0,0"
                Command="{Binding ProfileDetgailCommand}"
                HorizontalOptions="Center"
                Text="プロフィールを修正"
                WidthRequest="200" />
    </VerticalStackLayout>
</ContentPage>ここまでの実装の動作を確認してみると、画面遷移時にパラメータを受け取っ�て表示できていることが分かります。
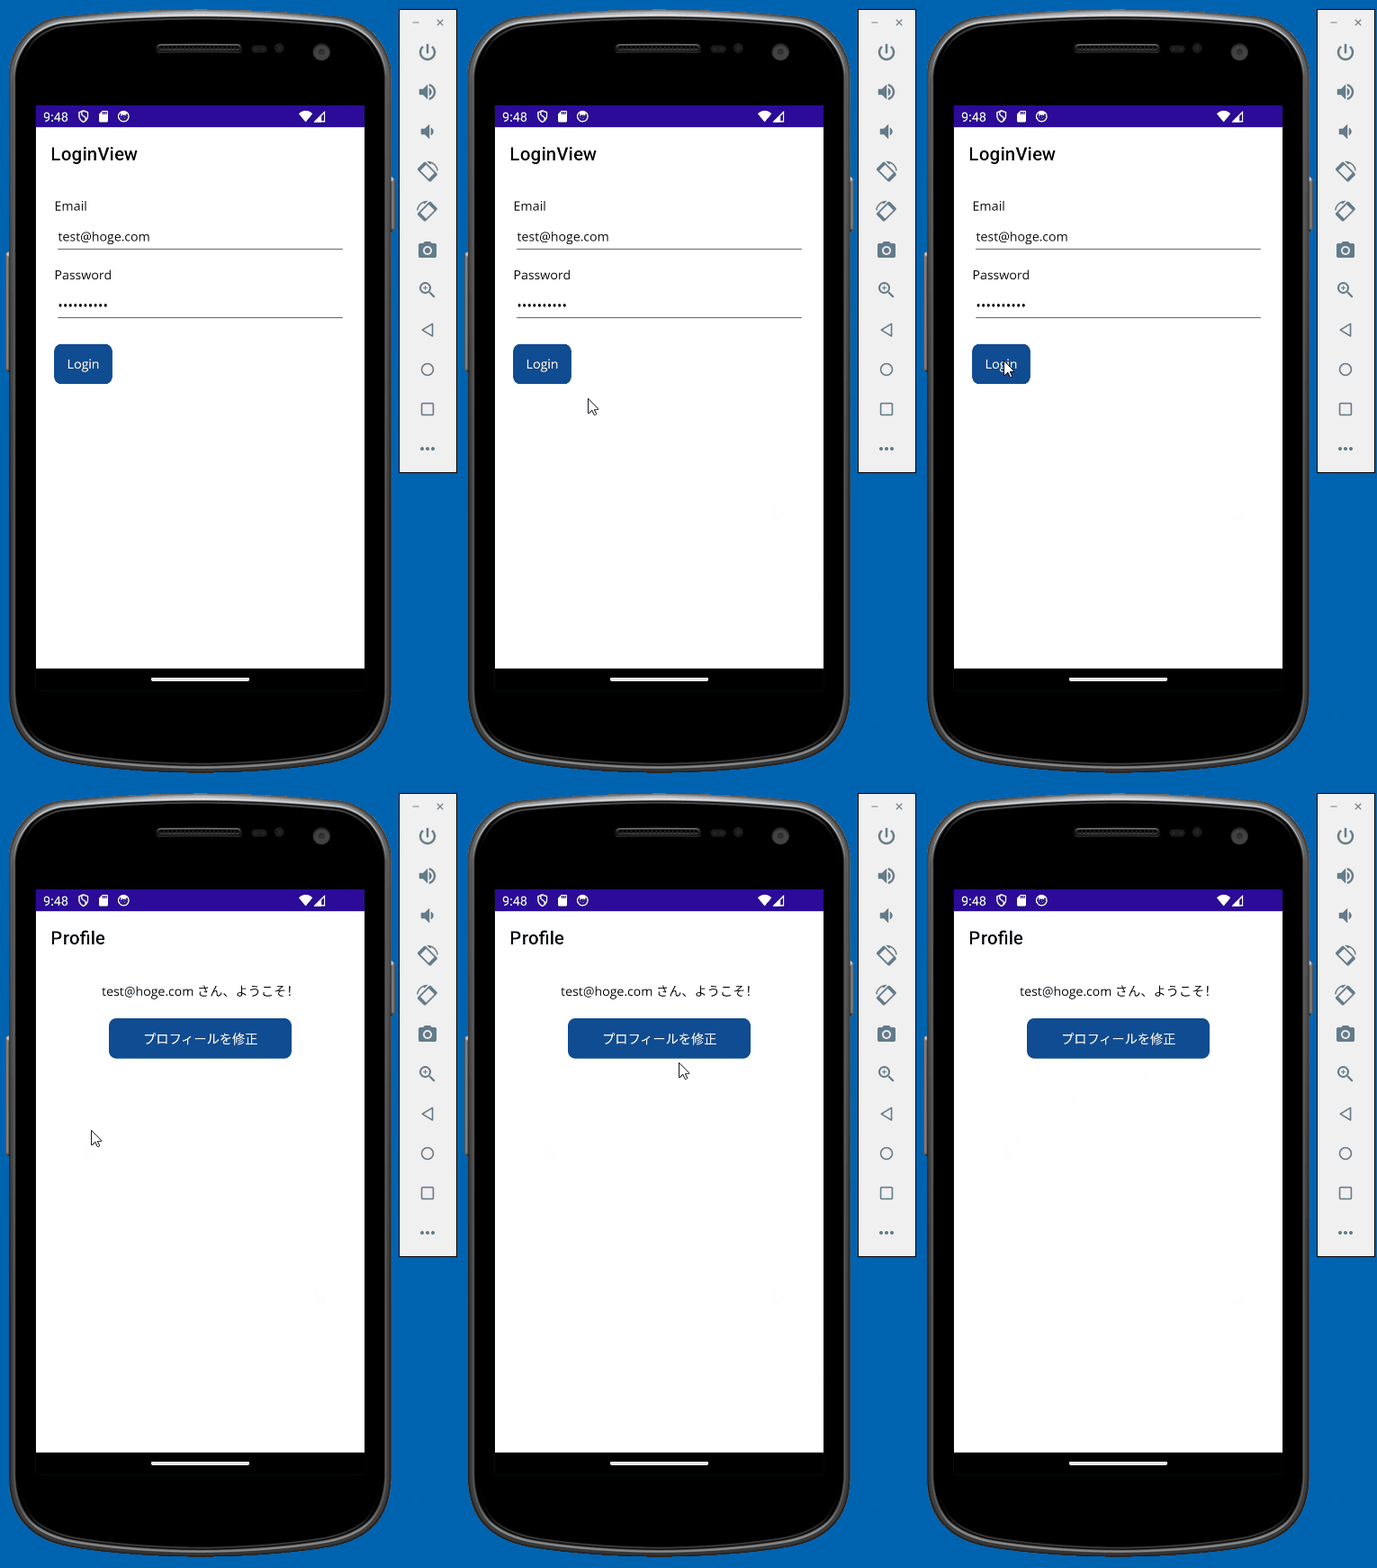
ナビゲーションスタックにページを登録する
これまでの画面遷移方法は、絶対ルートを使用した方法でRoute属性に登録したページに\\を付けていました。
絶対ルートでのページの移動はナビゲーションスタックを上書きし、新しいページの構造を作成します。そのため Android 端末にある戻るボタン◀を押すとアプリケーションは閉じる動作になります。
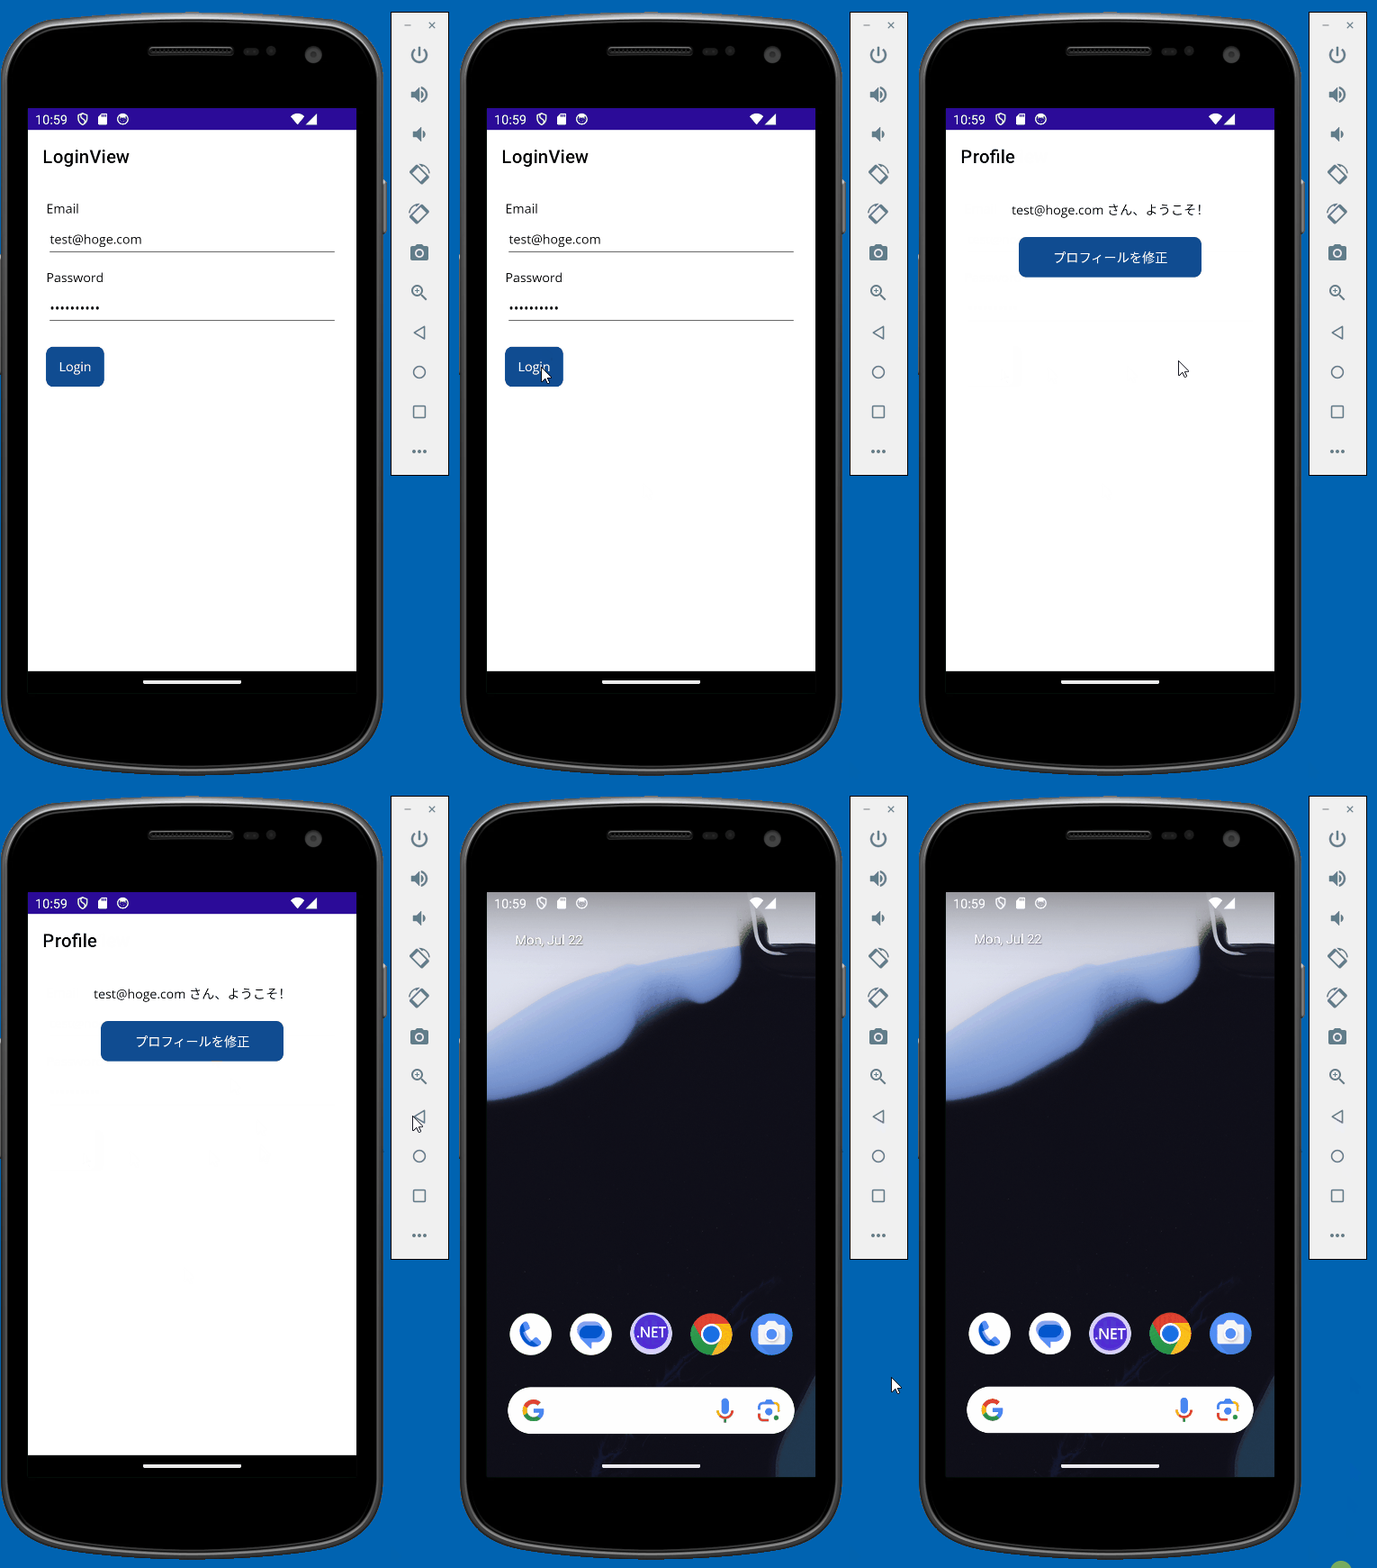
次はプロフィール詳細画面を相対ページとして指定し、ナビゲーションスタックに積まれる方法で画面遷移をさせたいと思います。
プロフィール詳細ページと ViewModel の作成
これまでと同様に以下のページと ViewModel を作成します。ViewMdoel の生成やバインディングの方法は同じなので詳細は割愛します。
<?xml version="1.0" encoding="utf-8" ?>
<ContentPage x:Class="AppShellNavigation.Views.ProfileDetail"
             xmlns="http://schemas.microsoft.com/dotnet/2021/maui"
             xmlns:x="http://schemas.microsoft.com/winfx/2009/xaml"
             Title="ProfileDetail"
             Shell.ForegroundColor="Black"><!-- バックボタンが白色なので黒色に変更 -->
    <VerticalStackLayout Padding="20" MaximumWidthRequest="600">
        <VerticalStackLayout>
            <Label Text="Email" />
            <Entry Margin="0,2,0,0"
                   HorizontalOptions="Center"
                   Text="{Binding Email}"
                   VerticalOptions="Center"
                   WidthRequest="200" />
        </VerticalStackLayout>

        <Button Margin="0,20,0,0"
                Command="{Binding BackCommand}"
                HorizontalOptions="Center"
                Text="戻る"
                WidthRequest="200" />
    </VerticalStackLayout>
</ContentPage>using CommunityToolkit.Mvvm.ComponentModel;
using CommunityToolkit.Mvvm.Input;
namespace AppShellNavigation.ViewModels
{
[QueryProperty(nameof(Email), "email")]
public partial class ProfileDetailViewModel : ObservableObject
{
[ObservableProperty]
private string _email;
[RelayCommand]
private async Task Back()
{
// ナビゲーションページをPopする(前のページに戻る)
await Shell.Current.Navigation.PopAsync();
}
}
}
using AppShellNavigation.ViewModels;

namespace AppShellNavigation.Views;

public partial class ProfileDetail : ContentPage
{
	public ProfileDetail()
	{
		InitializeComponent();

		BindingContext = new ProfileDetailViewModel();
	}
}using CommunityToolkit.Mvvm.ComponentModel;
using CommunityToolkit.Mvvm.Input;
namespace AppShellNavigation.ViewModels
{
[QueryProperty(nameof(Email), "email")]
public partial class ProfileViewModel : ObservableObject
{
[ObservableProperty]
private string _email;
[ObservableProperty]
private string _modifiedEmail;
partial void OnEmailChanged(string value)
{
ModifiedEmail = $"{value} さん、ようこそ!";
}
[RelayCommand]
private async Task ProfileDetgail()
{
await Shell.Current.GoToAsync($"profiledetail?email={_email}");
}
}
}
using AppShellNavigation.Views;

namespace AppShellNavigation
{
    public partial class AppShell : Shell
    {
        public AppShell()
        {
            InitializeComponent();

            // ProfileDetailページをProfileページの下の階層として登録
            Routing.RegisterRoute("profile/profiledetail", typeof(ProfileDetail));
        }
    }
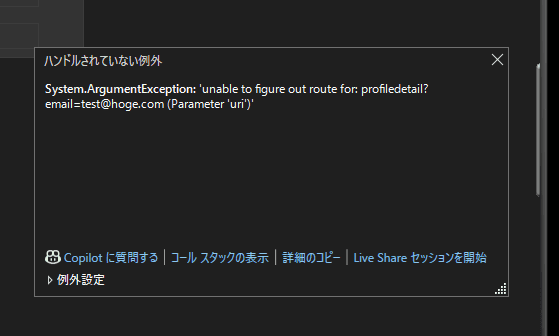
}階層ページのルーティングをAppShell.xamlで指定すると例外が発生するのでコードビハインド側AppShell.xaml.csで登録しています。
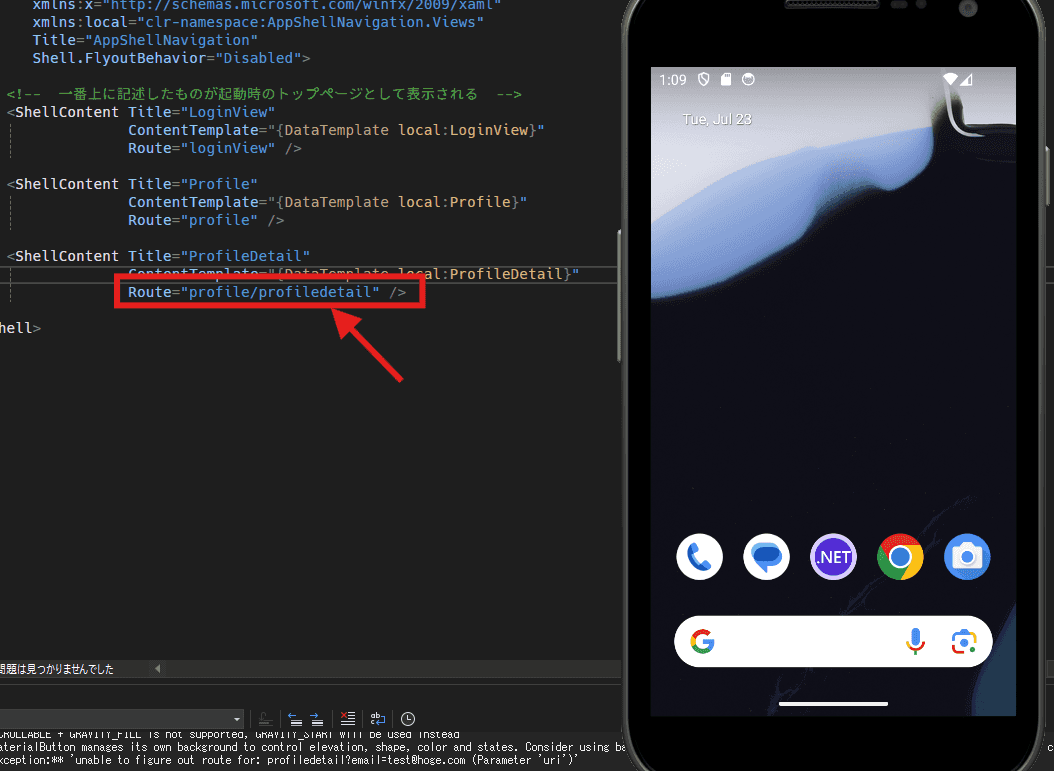
これまでの実装を確認します。

ナビゲーションスタックにプッシュ(登録)されたページはヘッダーに戻るボタンが表示されているのが分かります。
この戻るボタンを押すことで前のページに戻ることが出来ますし、Button要素に設定したコマンドではナビゲーションスタックを Pop(現在表示されているページを削除)する処理を記述しているので同様に前のページに戻ることが出来ています。
動画では試していませんが、Android の戻るボタン◀でも同様に前のページに戻ります。
起動時の画面をオーバーライド
冒頭でAppShell.xamlで一番上に記述したShellContentのページが起動時に表示されると言いましたが、App.xaml.csに以下の記述をすることで起動時のページをコントロールすることが出来ます。
namespace AppShellNavigation
{
    public partial class App : Application
    {
        public App()
        {
            InitializeComponent();

            MainPage = new AppShell();
        }

        /// <summary>
        /// 起動時の処理をオーバーライド
        /// </summary>
        protected override async void OnStart()
        {
            // AppShell.xaml では一番上に記述したページが起動時に表示されるが
            // 任意の位置(例えば最終行に記述したShellContent)を表示する場合の記述
            await Shell.Current.GoToAsync("//profile");

            base.OnStart();
        }
    }
}このように記述することで起動時にProfile.xamlを表示することが出来ます。
終わりに
今回は画面遷移を AppShell で行う方法について見てきました。
画面遷移はNavigationPageを使用した方法もありますが、小規模なアプリケーションの場合はNavigationPageが採用されることが多く、規模が大きくなると URI ベースのAppShellが採用されることが多いようです。
ただ、個人的には Web フレームワークのルーティングのように URI ベースで画面を制御できる方が使いやすいと感じたのでAppShellを採用することが多いような気がします。
どうしてもNavigationPageを使わなければならな��い場面があれば共有したいと思います。
今回作成したアプリケーションのリポジトリです。
