はじめに
前回に引き続き Prism の使い方について解説していきます。
今回は、UserControl で作成したダイアログウィンドウのカスタマイズ方法について触れていきたいと思います。
タイトルバーにスタイルが適応されない問題
今回作成しているサンプルアプリケーションでは、MaterialDesignThemes を導入してスタイルを変更していますが、UserControl で作成したダイアログウィンドウではタイトルバーのスタイルが適応されていないことが分かります。
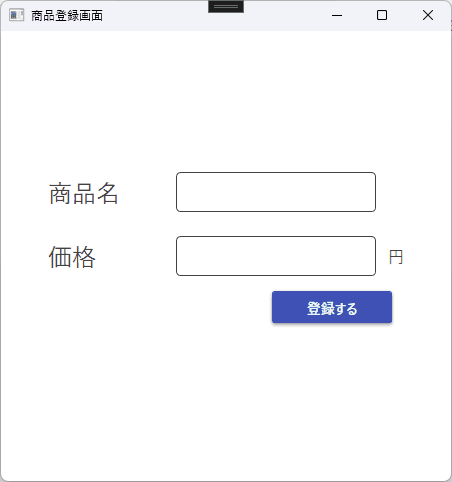
UserControl では UI を構成するために継承しているクラスの構成が異なるため、MahAppsMetro integrationに記載されている様なWindowをmetro:MetroWindowに変更することは出来ません。
<!-- UserControlでは使えない -->
<mah:MetroWindow
    x:Class="Sample_Prism.UI.Views.MainWindow"

<!-- 省略 -->
カスタムダイアログウィンドウの作成
この問題はカスタムダイアログウィンドウを登録することで解決できます。
まずは MaterialDesign を適応したい Window を作成します。
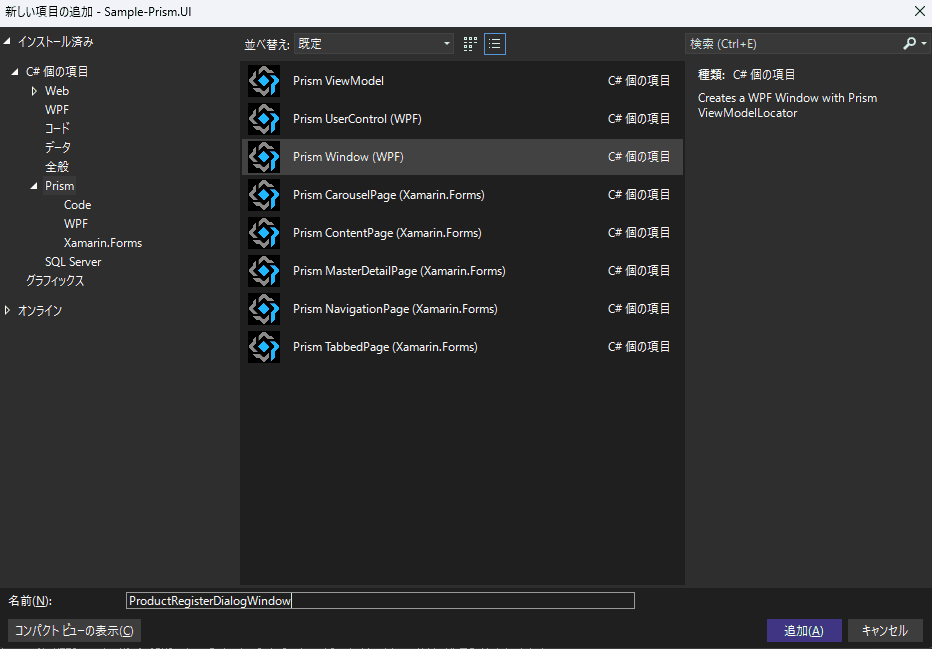
ProductRegisterDialogWindowViewModel.csも作成されますが、今回は使用しないので削除します。
作成したウィンドウを以下のように修正します。UserControl に画面サイズを指定していた場合はこちらに記述します。
<mah:MetroWindow
    x:Class="Sample_Prism.UI.Views.ProductRegisterDialogWindow"
    xmlns="http://schemas.microsoft.com/winfx/2006/xaml/presentation"
    xmlns:x="http://schemas.microsoft.com/winfx/2006/xaml"
    xmlns:mah="http://metro.mahapps.com/winfx/xaml/controls"
    xmlns:prism="http://prismlibrary.com/"
    Title="{Binding Title}"
    Width="450"
    Height="450"
    MinWidth="200"
    MinHeight="200"
    WindowStartupLocation="CenterOwner" />
ここでは画面の枠だけの記述をします。実際の入力フォームやボタンなどは UserControl で定義したものが表示されます。
次にこの画面のコードビハインドを修正します。
+ using MahApps.Metro.Controls;
+ using Prism.Services.Dialogs;

namespace Sample_Prism.UI.Views
{
    /// <summary>
    /// Interaction logic for ProductRegisterDialogWindow.xaml
    /// </summary>
+   public partial class ProductRegisterDialogWindow : MetroWindow, IDialogWindow
    {
+       public IDialogResult Result { get; set; }

        public ProductRegisterDialogWindow()
        {
            InitializeComponent();
        }

    }
}WindowをMetroWindowに変更し、IDialogWindowを追加で実装します。
public IDialogResult Result { get; set; }はIDialogWindow追加時に強制的に実装されられるプロパティです。
カスタムダイアログウィンドウの登録
App.xaml.csに作成したカスタムダイアログウィンドウを登録します。
// 省略

protected override void RegisterTypes(IContainerRegistry containerRegistry)
{
    // 省略

    // カスタムダイアログウィンドウを登録
+   containerRegistry.RegisterDialogWindow<ProductRegisterDialogWindow>(nameof(ProductRegisterDialogWindow));

    // 既に登録してあったUserControlで作成したダイアログ
    containerRegistry.RegisterDialog<ProductRegister, ProductRegisterViewModel>();

}
あとはダイアログの呼び出し元で、作成したカスタムダイアログウィンドウを指定するだけです。
カスタムダイアログウィンドウを使用する
IDialogService.ShowDialogメソッドの第四引数に登録したカスタムダイアログウィンドウを指定します。
- _dialogService.ShowDialog(nameof(ProductRegister), null, null);

+ _dialogService.ShowDialog(nameof(ProductRegister), null, null, nameof(ProductRegisterDialogWindow));
ここまでで一度ビルドしてアプリケーションを起動します。
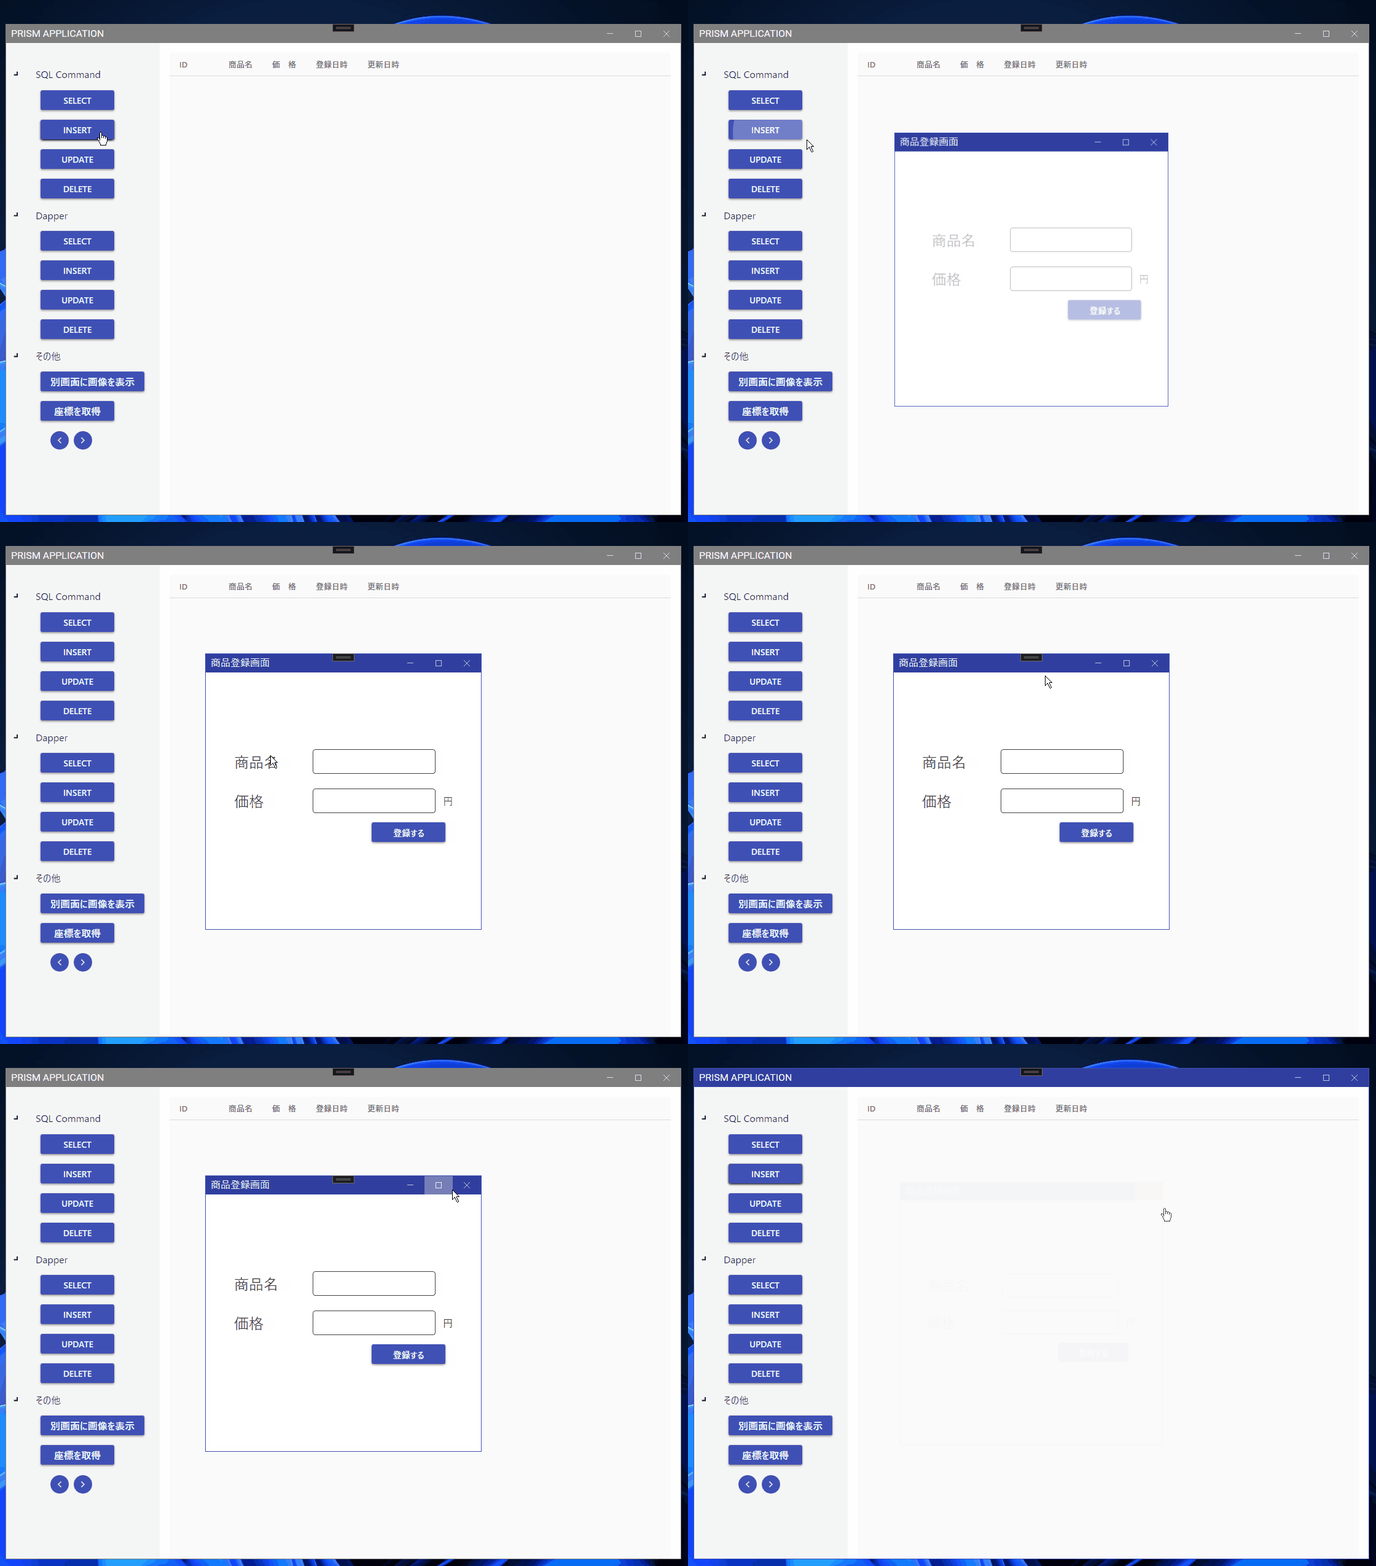
スタイルが適応されていることが確認できました。
